Raksha Bandhan is a very popular Indian Hindu festival. And Rakhi is a symbol of care, love and affection shared between brothers and sisters. Although Rakhi is more than just a thread. It represents the unique relationship that siblings share. Here we will learn how to make Rakhi.
Raksha Bandhan is also celebrated in other parts of the world, basically influenced by Hindu culture full of joy and love.
On this day, all the sisters tie Rakhi around the wrist of their brothers, and the brother takes the responsibility to protect and uphold the honour of his sister, and after that, the sisters receive a gift or money in return. Raksha Bandhan typically comes in August, also known as Shrawan month.
The designs of Rakhi were limited to tying a thread around the wrist of the brother. But now there is a wide variety of designer rakhis on the market. What if you make a rakhi by hand? That means it would be a very special and loving thing you can do for your brother. It will be a very sweet gift to your brother.
On the occasion of this festival, sisters often apply tilak to their brothers’ foreheads, fasten the holy thread known as a Rakhi to their brothers’ wrists, perform an arati, and pray for their wellbeing and long lives. The name “Raksha Bandhan,” However, which translates to “a bond of protection,” is given to this thread, which stands for love and lofty feelings. In exchange, the brother promises to take care of his sister and gives her a present. The sisters first tie a Rakhi on the Tulasi plant and another Rakhi on the peepal tree, praying for the preservation of the environment before they tie a Rakhi on their brothers’ hands.
Here are some fantastic suggestions for making your own Rakhi, which would undoubtedly give it a more unique and emotional touch.
Material that you may require to make a Rakhi.
- Scissors
- The bulk of silk threads
- Cotton and needle thread
- Handmade paper
- Ribbons
- Gems
- Glue
- Crystals, Motif
Handmade Paper Rakhi
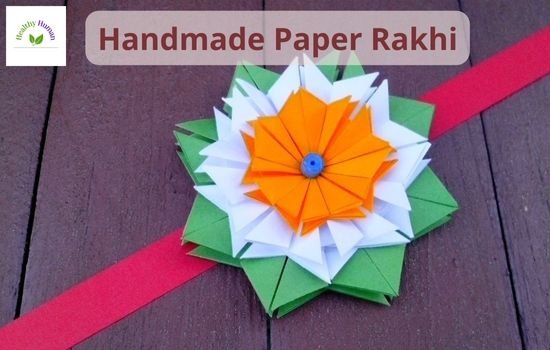
Things You will need
- Handmade paper
- Ribbons
- Gems
- Rhinestones
- Sequins
- Glue
- Scissors
Cut a tiny circle, square, or other desired form out of the handmade paper first. Then, Add jewels, sequins, rhinestones, and other ornaments to the handmade paper using glue. After that Place the handmade paper embellished on a 15 cm roll of ribbon. After that, give the glue some time to cure. You can now wear your handmade paper rakhi.
Sticker Rakhi
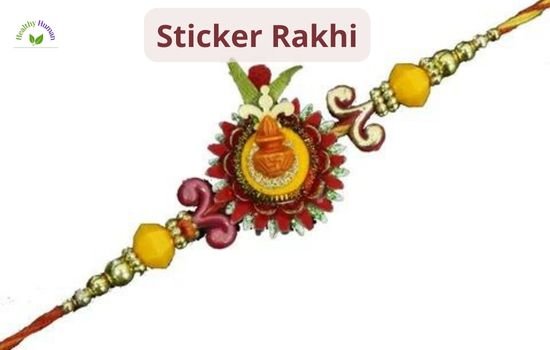
Things You will need
- Ribbon
- Felt foam or handmade paper of 2 colours
- Stickers of cartoons, animals, etc.
- Glue
- Scissors
However Take two rings of felt foam or handmade paper in the colour of your choice and cut them into two circles to form the Rakhi. Both circles should be in different colours, and the second one should be smaller than the first. Paste the smaller circle over the larger one after that. After that, apply a sticker of your choosing to the circle. Then, The circular may be embellished with beads, sequins, and other materials. Finally, hang the circular from a ribbon to dry. Your Rakhi is now complete.
Also read: Pearl: An Ultimate Guide
Wool Rakhi
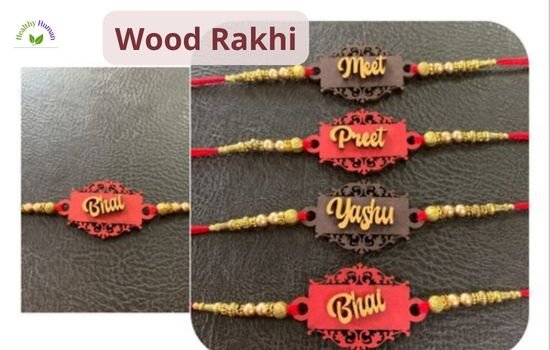
Things You will need
- 2 Colorful types of wool
- Colorful beads
- Scissors
- Fabric adhesive
For around 20 rounds, wrap the fingers in single-coloured wool. Moreover, Put a tight knot in the centre of the wool and tie it. To create the look of a flower, spread and cut the bow’s ends.
In addition to, Put a bright bead in the middle of the woollen flower to simulate the flower’s centre. Cut two equal pieces of wool, each of a different colour, to the length of your brother’s wrists, or approximately an inch.
After that, add colourful beads to the thread one at a time, making a knot after each one. Use the fabric adhesive to attach this thread to the back of the back.
How to Make Peacock Rakhi

Things You will need
- Pearl beads
- Glue
- Foam or leather blue colour base
- White, blue and Turkish colour stones
- Golden beads, dori and charm
- Shiny and glittery colours
First, outline the peacock on a little piece of blue foam. Then, cut two identical pieces. On the neck portion of the first peacock cutout, After that, apply glue to the outline and use the dazzling glitter colour.
For the peacock’s tail, cut little oval pieces of foam, and using adhesive, cover them with blue glitters. Attach a second foam peacock piece on top of the motif after placing the golden dori or thread on the motif’s back.
However, Utilize the charms and beads to embellish the string dori. With the golden thread zari, draw the peacock’s outline. After that, To finish the pattern, use Turkish, blue, and white stones.
Also Read: How to Clean a Clear Phone Case
Pom-Pom Rakhi
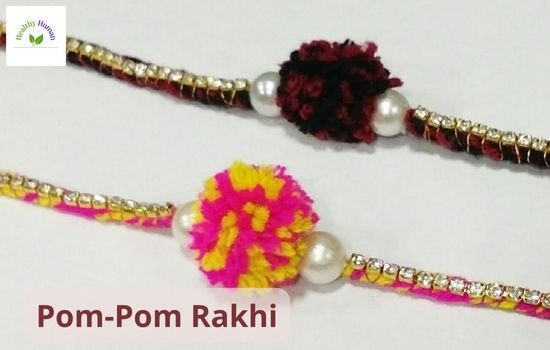
Things You will need
- Pom-Poms or wool in different colours for making pom-poms
- Silk thread
- Beads
- Scissors
- Needle
Although, Pom-poms are required for this DIY Rakhi and may be made with wool of various colours and a fork, or they can be purchased from stores. Take the silk thread and insert it through the needle’s hole when you have the pom-poms. Put the pom-poms through the needles after that. You may also insert some beads with various designs and colours between the pom-poms. Cut the thread once you’ve finished adding the beads and pom-poms, and your pom-pom rakhi is ready.
How to make Zari Motif Rakhi
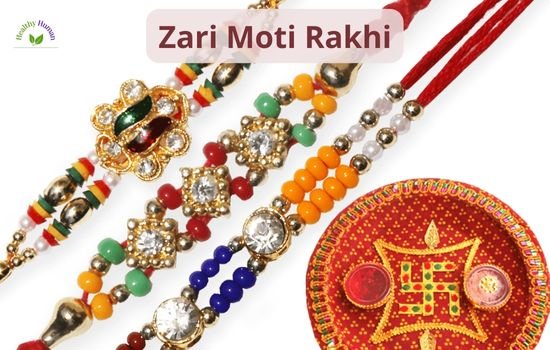
Things You will need
- Zari motifs
- Bright coloured lace
- Thread and needle/Fabric Adhesive
- Scissors
Take a Zari motif of your preferred pattern, colour and design to make a rakhi, such as a peacock or flowers.
After that, Take a piece of lace that matches the colours of the Zari motif, and stitch it to the sides of the motif. The lace can also be put on the motif’s back.
How to make Foam Rakhi
Things You will need
- Craft foam – 2 colours
- Cartoon sticker
- Satin thread
- Scissors
- Glue
Take a shiny coloured Styrofoam. Cut the foams into the shapes you choose, such as circles, squares etc. Place the two pieces of paste onto one another.
On top of the Rakhi, place the cartoon sticker, or you can place some mirror or rhinestones
After that Now attach the satin ribbon to the bottom of the Rakhi with the glue.
Diamond Crystal Rakhi

Things You will need
- Handmade paper
- Small diamonds/rhinestones/craft crystals
- One big crystal/rhinestone (blue colour)
- Satin ribbon
- glue
Cut the handmade paper into a diamond shape. Then red rhinestones should be pasted to the paper’s form with edges. Place the large blue crystal in the diamond-shaped centre now.
However, Around the large crystal, arrange the tiny rhinestones. Although, You may now attach your rakhi designs to the satin ribbon.
Heart Rakhi
Things You will need
- A satin ribbon
- White felt paper.
- Heart stickers
- Glue
- Scissors
- Glitter
Although Create a square out of the felt paper. After that, ensure that the edges are straight. The felt paper should be covered in the glue on both sides.
After that, cover one side of the felt paper with glitter. Attach the opposite end of the satin ribbon.
Then remove the heart sticker’s backing by peeling it off. Then, Place it on the ribbon-connected felt paper.
Jute Flower Rakhi
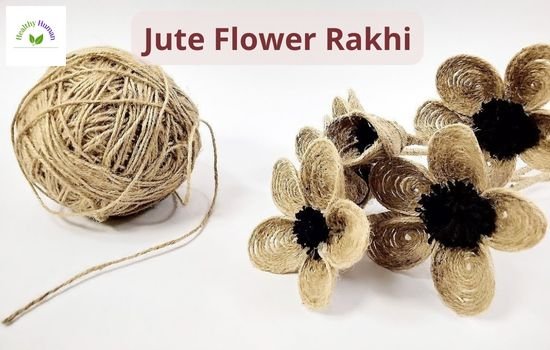
- Readymade Jute flowers – red colour (small size), green colour (big size)
- Crystal embellishments (sticky ones)
- Red satin ribbon
- Glue
Also Read :- How to Make a Heart with a Gum Wrapper
First, affix the little red-coloured jute flower to the top of the larger one (green colour).
Then, affix the crystal adornment to the centre of the little flower.
Moreover, Attach the satin ribbon with this unit of red and green flowers. So that the patterns for your Jute Flower Rakhi are complete.


