

Attempting to tie a balloon can be deceptively difficult. But, like shoelaces before it, once you’ve mastered your form, you’ll soon forget it was ever so difficult. Your fingers are more agile than you realize—all they need is a little assistance.
Although the balloon is kind of compulsory thing which we are using at every celebration. Somewhere celebration seems to be incomplete without the balloons. These are the things not for a particular age group. From a child to adults even old ones also like them. One fact In using ballon in every function is that it is not a spiritual or religious thing but still has so importance.
Mostly to give a surprise to our loved ones we prefer a decoration of different colors of balloons. However, couples are also using this to celebrate their special movement. And there is an encouraging thing also they always give us a lesson to fly high in the sky. Just broke every hindrance and fly high. Spreading happiness always is the major factor.
Before Tying a Balloon
To tie a balloon, you must first have an inflated balloon…
- I recommend that you use a balloon pump to inflate balloons rather than your mouth.
- To be honest, I believe that inflating a balloon with your mouth is an unnecessary effort (especially if you intend to inflate several balloons or more…).
- Another disadvantage of mouth inflating is that the balloon may pop while you are inflating it and slap you, which can be very painful.
Health Benefits Of Pumpkin Seeds
Simple Steps to Tie Balloon
Before Tie-up ballon, We need to put some air inside of it. through the mouth also we can do this. But If we need them in bulk. Here, are some quick and simple steps to tie the balloon.
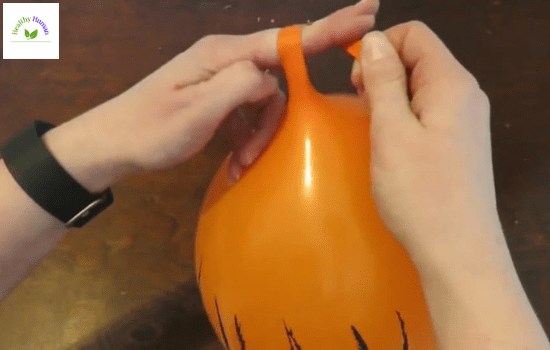
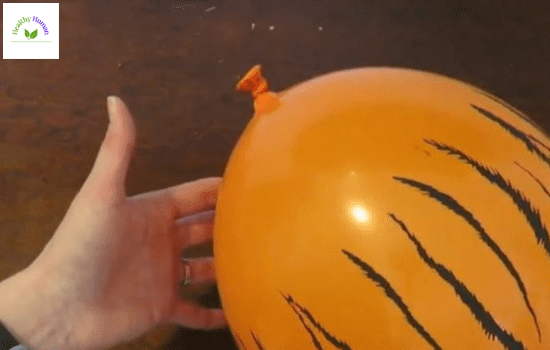
Stretch balloon from neck
After taking a balloon first check it. There may be a small hole or something by stretching it. Then after getting the ballon is okay Blow it. Through mouth or pump can blow it. After that grab it from its neck. Make sure you had filled helium gas so need to be careful while tying it. First, put your fingers in that position which is shown in the figure.

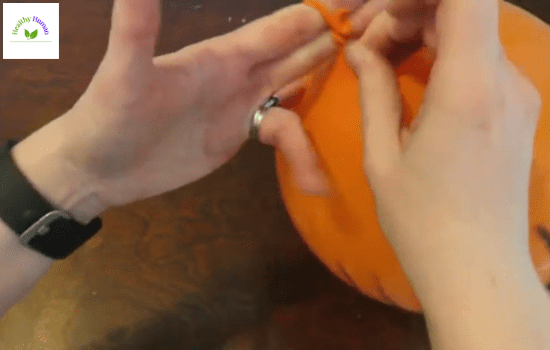
Turn stretched area
After stretching that area rotate the upper part. complete one circle just shown in the figure also. This will help in creating a knot which a tight area in it.
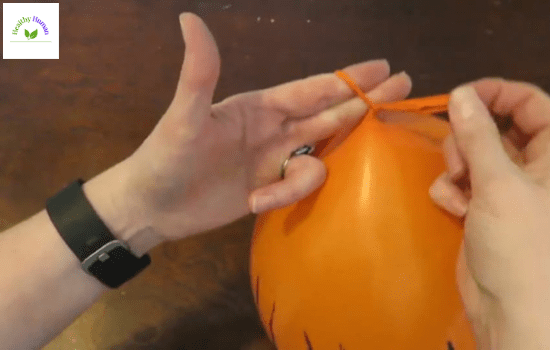
Put the upper part inside the space
After rotating from the top. Put that area inside the space between them. Just like shown in the figure also. Be careful while doing it sometimes if it is loose to grab. Air will blow out from the balloon. So, in this step, one should bed very careful about it.
Stretch it outside the space
After completing the previous step. Made sure to stretch it from outside that space. Stretch it as shown in the figure. Because if it loses so air can come outside also. Make sure to tighten it properly so that it can stay and adjust the air pressure. This is the most important part to tie a balloon.
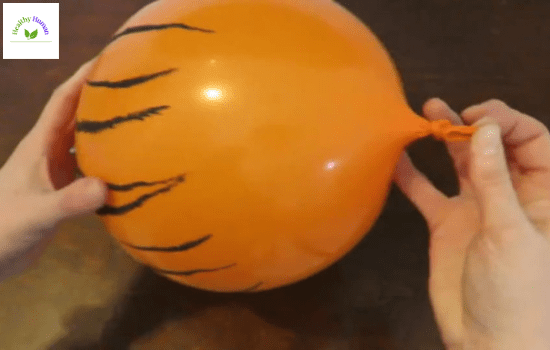
Complete knot
After the previous step. As per the figure stretch it in this way so, that the knot gets completed. And this is the actual last step to it. Now on the upper surface of the balloon, we can also add some text on it. Check the air pressure of the balloon which helps to know the stability period of the gas which is filled inside the balloon and make sure not to blow a very small balloon. that is not founf=d to be that much attractive and easy to have. In helium, and gas balloons make sure to be very careful. Because they can travel so far away in the sky also. Its the important part to tie a balloon.
Stretch again
For a long time stability of the balloon stretch it on the top layer. also need to think about not stretching a lot of usage of any other Pintc in that particular arena which h is shown in the picture below. This is the actual way to tie your tie-up in a balloon. This also stretches the body of the balloon that is resulted in the effectiveness of the balloon.

Hurray, now your balloon is ready for a particular purpose. This is just like a simple balloon market. most of the time we need to have a tight balloon that has great flexibility. This is not only good for the ballon but also this is very good to have a look at. for more creativeness and ac liveness we can also add some quotes or the nickname which we are using. This really makes them happy. Repeat these same steps to have the bowl ballon in bulk. Now, this knot is also long is good. Prevent the ballon from several different factors just like pin, any sharp substance. If it contains helium gas inside so make sure to hold it for more time also. This is the last step to tying a balloon.
Congratulations! You’re finished. It may appear awkward at first, but after a few attempts, it will become second nature, and you will agree that this is the best way to tie a balloon knot!
Ballon Anatomy
Learn about the anatomy of a balloon. To understand these instructions, we’ll need to know how to refer to each area of the balloon that we’ll be working with. Memorizing these terms, or simply consulting this list if you become confused, will be extremely beneficial in the task ahead of us.
The body is the main area of the balloon; it is the spherical or oval-shaped chamber that we fill with air.
The lip is the thicker ring that surrounds the opening of the balloon and is where air enters and exits the balloon.
The neck is the slightly elongated area between the body and the lip.
SPECIAL TIP: If you have a lot of balloons to tie, you should invest in a balloon tying tool.